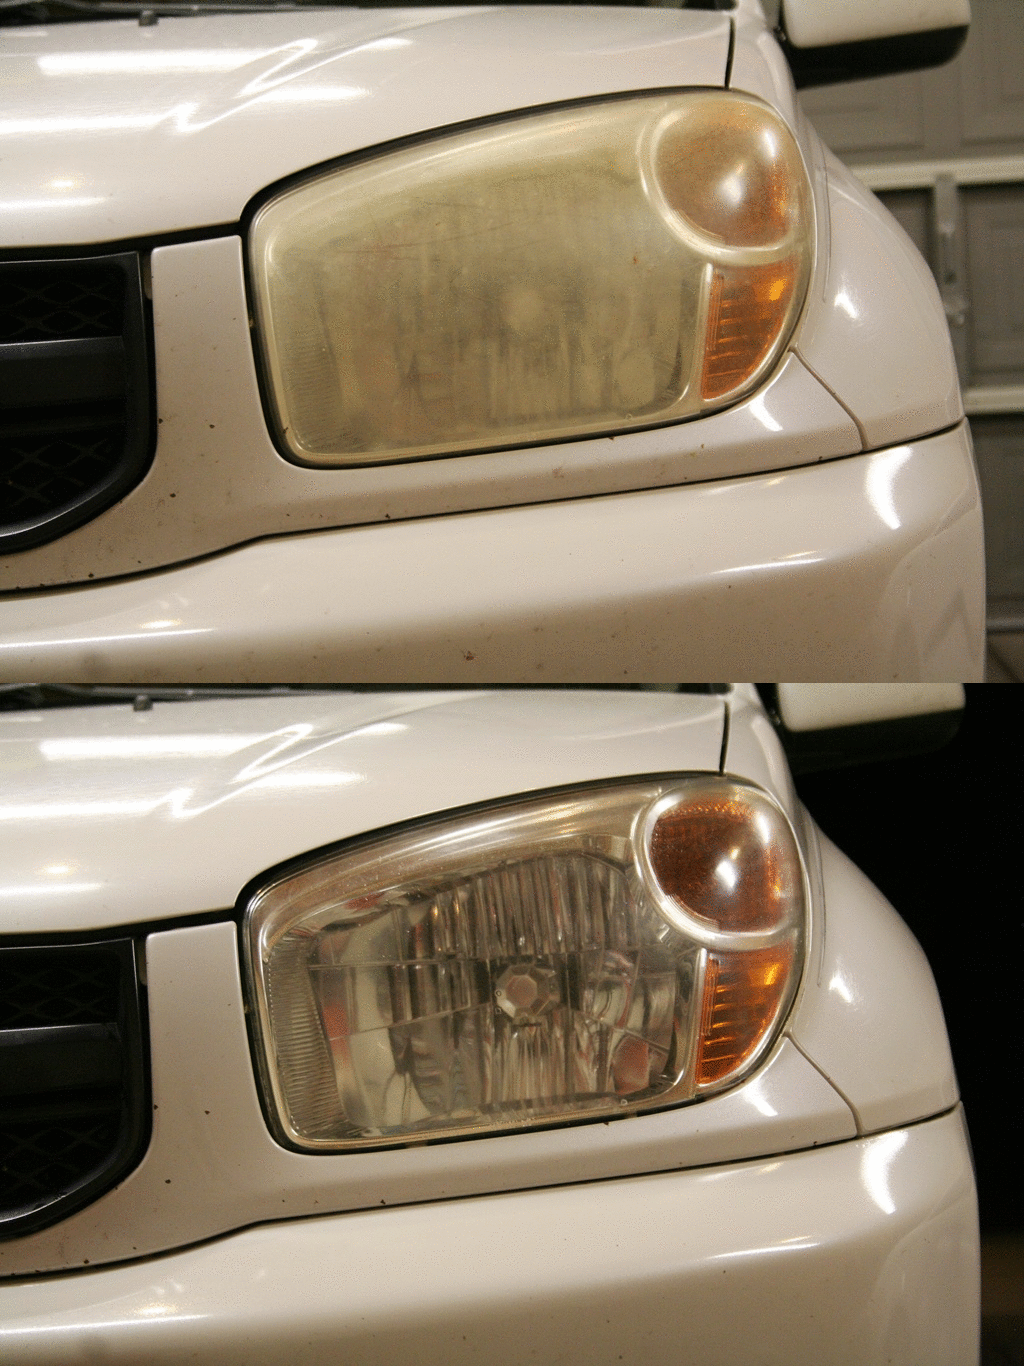
Headlight Buffing vs. Replacing: See Clearly and Save
Published On 19/7/2024, 1:25:59 pm Author Uttkarsh SinghHeadlights are crucial for nighttime driving and low-visibility conditions. Over time, exposure to sunlight and the elements can cause them to become cloudy or yellowed, reducing light output and creating a safety hazard. This blog post will help you decide between headlight buffing and replacement, keeping your car safe and your wallet happy.

Most modern headlight lenses are made of a clear plastic called polycarbonate. This plastic is great for weight and strength, but it has a weakness: susceptibility to ultraviolet (UV) light from the sun. Over time, UV rays break down the chemical bonds in the outer layer of the plastic, causing it to weaken and rearrange. This rearrangement scatters light differently, making the lens look cloudy and yellowed.
This process is called oxidation.
Oxidized headlight Lenses can reduce light output by up to 50%! This significantly hinders your nighttime visibility and makes it harder for others to see you on the road.
Signs You Need Headlight Buffing
Cloudy or Yellowed Headlights: This is the most obvious sign of headlight oxidation, caused by the sun's UV rays breaking down the plastic lens. Scratches (with a caveat): Buffing can address light scratches, but deeper scratches may require replacement.
But before you head straight for a replacement, consider headlight buffing since it is cost effective.
In India, professional headlight buffing typically ranges from ₹400 to ₹1000 per headlight, significantly cheaper than replacing them. Most buffing jobs can be completed within an hour, making it a time-saving option. Detailing studios specialize in car aesthetics and often have technicians trained in headlight restoration. They may offer more advanced buffing techniques and higher-quality products.
Buffing process
Masking tape
- Soap and water
- Sandpaper (various grits: typically 600, 1000, and 2000 grit)
- Headlight polishing compound
- Microfiber cloths
- A spray bottle with water
- Buffing pad or drill with a buffing attachment
- UV sealant (optional)
Step-by-Step Process
Prep Work
- First, the headlight is given a good wash with soap and water to remove all the dirt and grime.
- Next, masking tape is applied around the headlight to protect the car's paint from getting scratched.
Sanding
- First, 600 grit sandpaper is used. The sandpaper is wetted and the headlight is sanded in a horizontal motion, keeping the surface wet to avoid scratches.
- Next, 1000 grit sandpaper is used. The headlight is sanded the same way, smoothing out the surface.
- Finally, 2000 grit sandpaper is used. This step removes finer scratches and makes the surface smooth.
Buffing
- First, a polishing compound is applied to a microfiber cloth or directly on the headlight.
- Next, a buffing pad or a drill with a buffing attachment is used to buff the headlight in a circular motion until it looks clear.
- Finally, a clean microfiber cloth is used to wipe off any leftover compound.
Sealing (Optional but Recommended) A UV sealant is applied to the headlight to protect it from future oxidation and UV damage, following the product instructions for best results.


